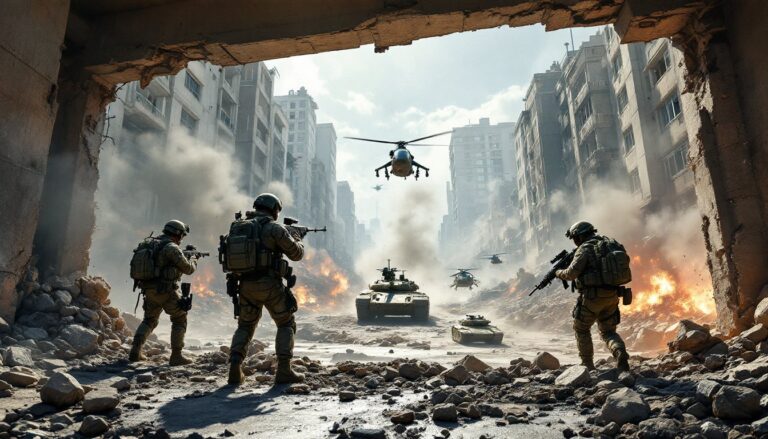
When players think of the unstoppable wall of blaster fire that anchors every objective push in Star Wars Battlefront 2, they’re thinking of the Heavy. He’s the tank, the suppressor, the guy who eats squad wipes for breakfast and still has shield left over. Whether someone’s grinding Galactic Assault on Hoth or sweating it out in Supremacy, mastering the Heavy class is one of the fastest ways to climb the scoreboard. This guide breaks down loadouts, tactics, and the small mistakes that keep most players stuck in mediocrity.
Table of Contents
ToggleKey Takeaways
- The Heavy class in Battlefront 2 excels at sustained damage and area denial with the highest trooper health pool (150 HP), making it ideal for holding choke points and anchoring objective pushes.
- The optimal Heavy loadout combines the Defender Star Card, Explosive Sentry, and Ion Shot ability, with weapon choice depending on map layout—FWMB-10K for open maps and DC-15LE for tight corridors.
- Heavy players must pre-aim corners and deploy the Combat Shield before engagement rather than reactively, as the class trades mobility for staying power and requires positioning discipline.
- Pairing with an Officer and using Sentry from elevated positions amplifies effectiveness, while avoiding mid-firefight Sentry deployment and monitoring weapon overheat are critical mistakes to prevent.
- Specialist snipers are the primary counter to Heavy, making cover positioning and squad coordination essential to neutralizing the threat and dominating scoreboards in Galactic Assault and Supremacy modes.
What Is the Heavy Class in Battlefront 2?
The Heavy is one of four base trooper classes in Star Wars Battlefront 2 (2017), alongside Assault, Officer, and Specialist. He’s built for sustained fire, area denial, and absorbing damage that would melt anyone else.
Key traits at a glance:
- High base health (150 HP), the highest of any trooper.
- Heavy blasters with large magazines and built-in cooling systems.
- Access to a deployable Combat Shield, Ion Torpedo, and Sentry ability.
- Slower movement and slower aim-down-sights compared to Assault.
In short: he trades mobility for raw staying power. If a team needs someone to hold a choke point on Kamino or sit on a command post, the Heavy is the answer.
Best Heavy Loadouts and Star Cards for Every Map
Heavy’s weapon pool is small but potent. The FWMB-10K remains a fan favorite for open maps like Crait and Geonosis thanks to its laser-accurate beam mode. For tighter corridors, think Death Star II or Kashyyyk, the DC-15LE with the Improved Cooling mod chews through enemies inside 25 meters.
A solid all-purpose pick is the TL-50, which behaves like a hybrid SMG/LMG and shreds at mid-range. Players coming from a detailed Heavy class guide will recognize this weapon as the meta default since the 2019 weapon rebalance.
Top Star Card Combinations for Maximum Firepower
For most maps, this three-card setup is hard to beat:
- Defender (boosted shield health), keeps the Combat Shield up long enough to push.
- Explosive Sentry, turns the Sentry into an area-clear nuke.
- Ion Shot (active card), strips vehicle and droideka shields fast.
Objective-heavy modes reward swapping Ion Shot for Resourceful, which refunds 25% of ability charge on kills. Loadout breakdowns from community-tested Heavy builds line up with this combo as the strongest general-purpose kit.
Combat Tactics and Playstyle Tips for the Heavy
Heavy isn’t a run-and-gun class. Players who treat him like Assault get melted by flanks and lose all that beautiful HP advantage.
A few rules that actually work:
- Pre-aim corners. The slow ADS speed punishes reactive aiming.
- Drop the Combat Shield before engaging, not after taking damage. It blocks blaster fire from the front but leaves the back exposed.
- Use Sentry from elevated positions. The spin-up time gets the user killed at ground level on busy maps.
- Pair with an Officer. Their Battle Command stacks with Heavy’s HP for a near-200 HP wall.
The Heavy’s strength is presence. Standing in a hallway with a shield up forces enemies to reroute, that’s value even without kills.
Heavy vs. Other Trooper Classes: Strengths and Weaknesses
Quick matchup breakdown:
| Matchup | Heavy’s Edge | Watch Out For |
|---|---|---|
| vs. Assault | Wins prolonged fights, beats him through shield | Loses if Assault flanks or uses Vanguard |
| vs. Officer | Outguns at every range | Battle Command healing extends fights |
| vs. Specialist | Wins mid-range with sustained fire | Headshot TTK from a sniper is brutal |
The TTK math favors Heavy whenever a fight lasts longer than 1.5 seconds. The trick is forcing that scenario instead of getting tagged from 60 meters by an NT-242. Specialists are the hard counter, staying in cover and pushing with teammates neutralizes that threat.
Advanced Strategies for Galactic Assault and Supremacy
In Galactic Assault, Heavy thrives on objective phases with tight chokepoints. Hoth’s trench run, the Theed throne room, and Endor’s bunker are practically designed for shield-and-Sentry combos. Players should bank Battle Points early with Sentry kills, then drop into a reinforcement like the Death Trooper or Wookiee Warrior when the team needs a hard push.
Supremacy rewards a different rhythm. Heavy excels during the command post capture phase, where his HP pool lets him contest circles solo. On Naboo or Felucia, a well-placed Sentry can lock down a capture point for 15+ seconds, often long enough to flip it.
PC players experimenting with visual or balance tweaks can find a healthy ecosystem of Battlefront II community mods that adjust Heavy’s animations and weapon FX, though none are allowed in multiplayer.
Common Mistakes to Avoid When Playing Heavy
Even experienced players fall into these traps:
- Holding the trigger too long. The DC-15LE overheats fast without Improved Cooling. Burst in 4–6 shot taps.
- Using Sentry mid-firefight. The deploy animation locks the player in place for 1.5 seconds, that’s a death sentence in open ground.
- Forgetting Ion Torpedo on vehicle maps. Crait and Hoth basically hand free points to Heavies who track AT-STs and speeders.
- Ignoring the Combat Shield’s rear vulnerability. Smart enemies will flank around it. Position with a wall behind.
- Sticking to one weapon. The FWMB-10K is great long-range but useless in Death Star corridors.
It’s also worth noting Battlefront 2 sometimes gets confused with EA’s other shooters. Even though the similar naming convention, Battlefield 2042 (often miswritten as battlefront 2042) and the upcoming Battlefield 6 are entirely separate DICE titles, different studios, different mechanics, different metas. Heavy tactics here don’t translate to those games.