Allatoona Pass Battlefield isn’t your typical FPS arena. It’s a map that blends brutal Civil War-era history with tactical gameplay, offering tight chokepoints, elevated defensive positions, and terrain that punishes reckless advances. Whether you’re grinding kills, holding objectives, or coordinating a squad push, understanding the historical bones underneath this virtual battlefield gives you a serious edge.
This guide breaks down everything you need to dominate Allatoona Pass: map layout, advanced tactics, optimal loadouts, and the mistakes that’ll get you killed before you reach the first ridge. If you’ve ever wondered why certain positions feel impossible to crack, or how to break them, you’re in the right place.
Table of Contents
ToggleKey Takeaways
- Master the Allatoona Pass Battlefield by leveraging elevated terrain and defensive chokepoints—defenders control the star fort while attackers must coordinate multi-route pushes to break through.
- Terrain mastery determines victory: use smoke grenades, split pressure on ridges, and suppressive fire to crack the defense, or hold elevated positions with coordinated squad roles.
- Communication beats raw aim on Allatoona Pass Battlefield—call enemy positions by zone, assign specialized roles pre-match, and stagger respawn timing to execute synchronized attacks or coordinated defenses.
- Avoid common fatal mistakes like rushing the center pass without support, ignoring ridge flanks, overcommitting to the star fort, and failing to adapt loadouts mid-match based on enemy strategy.
- Squad coordination and positioning strategy are essential for success, as solo players struggle significantly while veteran teams that prioritize tactical depth over mechanical skill consistently dominate the map.
What Is Allatoona Pass Battlefield and Why Does It Matter?
Historical Context: The Real Battle of Allatoona Pass
The Battle of Allatoona Pass took place on October 5, 1864, during Sherman’s Atlanta Campaign. Confederate forces under Major General Samuel French attacked Union troops commanded by Brigadier General John M. Corse, who famously held a critical supply depot against overwhelming odds. The terrain, rocky ridges, narrow gaps, and fortified positions, turned the fight into a brutal close-quarters slugfest.
The Union defenders used the high ground and earthworks to devastating effect, inflicting heavy casualties while barely holding their position. French’s forces controlled numbers but couldn’t dislodge entrenched defenders from the elevated star fort and surrounding ridges. The battle ended with a Confederate withdrawal, preserving Union supply lines and contributing to the eventual fall of Atlanta.
This wasn’t a sweeping maneuver battle. It was a grinding, positional fight where terrain decided outcomes, exactly the kind of historical engagement that translates well to tactical multiplayer shooters.
From History to Gaming: How Allatoona Pass Became a Virtual Battlefield
Allatoona Pass has appeared in several historical military games, most notably in tactical shooters and large-scale warfare titles that emphasize period-accurate maps. The map typically features narrow mountain passes, fortified hilltop positions, and limited flanking routes, mirroring the real battle’s geography.
Developers gravitate toward Allatoona Pass because it naturally creates asymmetric gameplay. Defenders get elevation and cover: attackers get numerical superiority or vehicle support, depending on the game mode. It’s a map that rewards positioning over pure aim, making it a favorite in games that emphasize strategic team play.
In titles like those covered by platforms such as Windows Central, the map has become a proving ground for coordinated squads. You can’t Rambo your way through Allatoona Pass. You either work the terrain and communicate, or you feed kills.
Key Features and Gameplay Mechanics of Allatoona Pass Battlefield
Map Layout and Strategic Positions
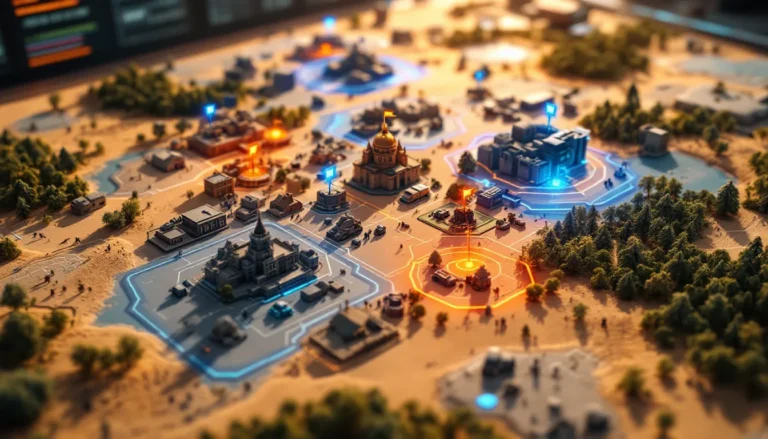
Allatoona Pass is typically split into three major zones:
- The Pass (Center): A narrow corridor flanked by steep ridges. This is the main route for attackers but offers minimal cover. Crossing it without smoke or suppression is suicide.
- Star Fort (Defender High Ground): The elevated fortification at the map’s heart. Whoever controls this position controls sightlines over the pass and nearby objectives. Expect heavy machine gun nests and sniper overwatch.
- Eastern and Western Ridges: Secondary high ground positions that flank the star fort. These routes are longer but safer for attackers looking to avoid the meat grinder in the center.
Most game modes place the primary objective near or inside the star fort, forcing attackers to push uphill under fire. Defenders spawn closer to elevated positions, giving them early control of chokepoints.
Terrain Advantages and Defensive Strongpoints
The map’s terrain heavily favors defenders, but smart attackers can exploit specific features:
- Rock Outcroppings: Scattered throughout the pass, these provide temporary cover for advancing infantry. Use them to leapfrog between positions under suppressing fire.
- Trench Lines: Connecting defensive positions near the fort, trenches offer protected movement for defenders and brutal close-quarters ambush points.
- Limited Vehicle Access: Tanks and armored vehicles can navigate the pass but struggle with elevation changes. They’re vulnerable to high-angle infantry fire from the ridges.
The star fort itself features thick walls, multiple firing ports, and limited entry points. It’s designed to be held by a smaller force against larger numbers, just like the real battle.
Available Game Modes and Objectives
Allatoona Pass typically appears in:
- Conquest/Domination: Multiple capture points spread across the pass and ridges. The star fort is almost always a contested objective, creating a persistent firefight.
- Rush/Operations: Attackers must capture sequential objectives, usually starting at the base of the pass and pushing uphill to the fort. Defenders get limited respawns, adding pressure.
- Team Deathmatch: Less common but available on smaller map variants. The terrain still dictates flow, with most engagements happening near the central pass.
Objective placement matters. In modes where the star fort is not the primary objective, the meta shifts significantly. Suddenly, flanking routes become viable, and holding the high ground becomes less critical.
Advanced Strategies for Dominating Allatoona Pass
Offensive Tactics: Breaking Through Enemy Lines
Pushing into Allatoona Pass requires patience and coordination. Here’s what works:
- Smoke the Pass: Deploy smoke grenades across the central corridor before advancing. This blocks defender sightlines from the fort and ridges, giving your team precious seconds to reach cover.
- Split Pressure: Never funnel your entire squad through the center. Send 2-3 players up each ridge while the main force pushes the pass. Defenders can’t cover everything simultaneously.
- Suppress the Fort: Assign at least one support player with a high-capacity LMG to lay sustained fire on the star fort’s firing ports. This won’t get kills, but it forces defenders to duck, opening windows for your advance.
- Use Explosives on Chokepoints: Grenades, mortars, and explosive charges are essential for clearing entrenched positions in trenches and behind rock cover.
The worst mistake attackers make is rushing without recon. Use drones, spotting flares, or scouts to identify defender positions before committing to a push.
Defensive Strategies: Holding the High Ground
Defending Allatoona Pass is about controlling information and creating kill zones:
- Prioritize the Star Fort: Assign your best players here. Machine gunners should cover the pass: marksmen should watch the ridge approaches.
- Trench Roamers: Have 1-2 mobile defenders patrol the trench lines connecting your positions. They’ll catch flankers and relay enemy movements.
- Delay, Don’t Overcommit: If attackers capture a ridge, don’t throw bodies at retaking it immediately. Fall back to secondary positions and force them to push into your new kill zone.
- Vehicle Denial: Keep anti-tank classes near the pass entrance. Destroying the first enemy vehicle early often stalls an entire offensive.
Many defenders make the mistake of staying static. The map’s trench network allows rapid repositioning. If attackers identify your position, relocate before they bring explosives or focused fire.
Squad Coordination and Communication Tips
Allatoona Pass punishes lone wolves. Here’s how to keep your squad effective:
- Call Enemy Positions by Zone: Use the three-zone system (Pass, Star Fort, East/West Ridge). “Sniper, East Ridge, mid-level outcropping” is infinitely more useful than “Sniper over there.”
- Assign Roles Pre-Match: Designate one player for smoke/support, one for anti-vehicle, and one for objective rushing. Role overlap wastes resources.
- Use Ping Systems Aggressively: If your game has a ping or spotting mechanic, spam it. Defender positions change rapidly, and real-time intel is everything.
- Coordinate Respawn Timing: Stagger your squad’s deaths if possible. Respawning together lets you execute coordinated pushes instead of trickling in one by one.
Many competitive tips emphasize that on maps like Allatoona Pass, communication beats mechanical skill. A mediocre squad with comms will outperform fraggers playing solo.
Best Loadouts and Class Selections for Allatoona Pass
Recommended Infantry Classes and Weapon Choices
Your loadout should match your role and the map’s engagement ranges:
For Attackers:
- Assault Class: Mid-range rifles (ACR, M4A1 variants) with reflex sights. You’ll be engaging at 30-75 meters across the pass. Bring smoke grenades as your tactical.
- Support/LMG: High-capacity machine guns (M249, PKM) with bipods. Your job is suppression, not kills. Equip ammo boxes to sustain fire.
- Engineer/Anti-Tank: Essential for vehicle denial. Prioritize launchers with fast reload times. Bring repair tools if your game allows it, damaged friendly vehicles are easy targets.
- Medic (if available): SMGs or carbines for close-quarters trench fighting. Your squad will take constant chip damage crossing the pass: healing efficiency matters more than your KD.
For Defenders:
- Marksman/Sniper: Bolt-action or DMR rifles with 4-8x optics. Post up in the star fort or ridge positions. Prioritize enemy medics and support players.
- Support/LMG: Same as attackers. Control the pass with sustained fire. The star fort’s elevated position gives you perfect firing angles.
- Assault Class: Defenders need versatility. Mid-range rifles with variable optics (hybrid sights) let you engage attackers in the pass and close-quarters flankers in trenches.
- Engineer/Anti-Tank: Watch the pass entrance. First vehicle kill often breaks the attacker’s momentum.
Universal Tips:
- Avoid shotguns except in the trench networks. Engagement ranges are too long everywhere else.
- Optics matter. On ridges and in the fort, use at least 3x magnification. In trenches, stick to reflex or iron sights.
- Explosive spam is real. Equip flak jackets or equivalent damage reduction if your game offers it.
Vehicle Selection and Deployment Tips
Vehicles on Allatoona Pass are high-risk, high-reward:
For Attackers:
- Light Armor/APCs: Better than main battle tanks. They’re faster, can retreat quickly, and have enough firepower to suppress the fort. Deploy them at the pass entrance for mobile cover.
- Artillery/Mortar Vehicles: If available, park them outside the main combat zone and shell the star fort. This forces defenders to reposition or take cover.
- Avoid Heavy Tanks in the Pass: They’re too slow and can’t elevate their main guns enough to hit fort positions effectively. They become expensive stationary targets.
For Defenders:
- Stationary Emplacements: If your game includes buildable MG nests or mortars, place them in the star fort with overlapping fields of fire.
- Don’t Deploy Vehicles Forward: Defender vehicles should stay near spawn as rapid-response tools, not frontline fighters. The terrain doesn’t favor vehicle mobility.
Vehicle Crew Coordination:
- Drivers should focus on positioning and evasion, not kills. Gunners handle targets.
- Always have an engineer repairing from inside or nearby. A half-damaged vehicle is worse than no vehicle, it’s a free kill for enemy AT players.
Common Mistakes to Avoid on Allatoona Pass Battlefield
Even experienced players fall into these traps:
Rushing the Center Pass Without Support: This is the #1 noob mistake. The pass is a kill funnel. If you don’t have smoke, suppression, or a distraction on the flanks, you’re just feeding kills.
Ignoring the Ridge Flanks: Defenders often tunnel-vision on the pass and forget to watch the ridges. Attackers who ignore the ridges miss their best chance to break the defense. Both sides lose by neglecting these routes.
Overcommitting to the Star Fort: Yes, it’s the key position, but if attackers control both ridges, the fort becomes a deathtrap. Know when to fall back to secondary positions instead of dying on repeat.
Poor Spawn Beacon Placement: If your game has squad spawn mechanics, place beacons behind cover on ridges or in secured trenches, never in open areas. A compromised beacon kills your entire squad’s momentum.
Static Sniping: Sitting in one spot for more than two kills gets you counter-sniped. Even from the star fort, reposition after every engagement.
Not Adapting Loadouts Mid-Match: If the enemy starts spamming vehicles, switch to anti-tank. If they’re smoking the pass constantly, grab thermal optics. Flexibility wins maps.
Solo Vehicle Crews: Running a tank or APC without a dedicated gunner and engineer is a waste. Vehicles need full crews to survive the focused fire this map generates.
One pattern shows up across multiple achievement guides: players trying to force the same tactic repeatedly instead of adapting. Allatoona Pass punishes stubbornness.
How Allatoona Pass Compares to Other Historical Battlefields in Gaming
Allatoona Pass sits in a specific niche among historical FPS maps. Here’s how it stacks up:
Vs. Gettysburg Maps (Various Games): Gettysburg focuses on large-scale open-field combat with gradual elevation changes. Allatoona Pass is much tighter and more vertical, with limited flanking options. It’s closer to siege warfare than line battles.
Vs. Omaha Beach (WWII Shooters): Both are attacker-punishing maps, but Omaha is a horizontal gauntlet with minimal cover. Allatoona offers multiple vertical routes and more opportunities for tactical repositioning.
Vs. Verdun/Trench Maps (WWI Games): Allatoona shares the defensive fortification emphasis but with more dramatic elevation changes. Verdun maps are flatter with longer trench networks. Allatoona’s terrain creates more isolated engagements.
Vs. Fort Sumter/Charleston Maps: These maps focus on static bombardment and siege mechanics. Allatoona is more infantry-focused, with fortifications serving as strong points rather than the entire map.
Allatoona Pass excels at creating asymmetric gameplay without feeling unfair. Defenders have clear advantages, but attackers have tools and routes to overcome them. It’s less punishing than pure siege maps but more structured than open-field historical battles.
The map’s design philosophy, elevation-based advantage, limited but meaningful flanking routes, and positional dominance, has influenced modern competitive map design in games far removed from historical settings.
Community Insights and Player Reviews
Community opinions on Allatoona Pass are consistent across games and platforms:
What Players Love:
- Tactical Depth: The map rewards coordination and planning over twitch reflexes. Veterans appreciate that positioning and game sense matter more than pure aim.
- Historical Authenticity: Players enjoy the period-accurate terrain and fortifications, especially in games that emphasize historical immersion.
- Replayability: The map plays differently depending on game mode and team composition. Conquest matches feel distinct from Rush/Operations rounds.
Common Complaints:
- Snowball Potential: If defenders lose the star fort early, recapturing it is extremely difficult. Some players feel the map becomes one-sided once momentum shifts.
- Frustration for Solo Players: Without team coordination, the map is miserable. Solo queue players often report feeling helpless against coordinated squads.
- Vehicle Balance Issues: In some games, vehicle spawn timers or strength create frustrating imbalances. Too many vehicles trivialize defenses: too few make attacking impossible.
Competitive Scene Perspective:
Allatoona Pass rarely appears in competitive rotations because its defender bias requires specific rule adjustments. Tournament play often uses modified versions with adjusted spawn timers or objective placements to balance win rates.
Casual players seem to enjoy the map more than competitive grinders, who prefer more symmetrical designs. Community polls consistently rank it as “fun but occasionally frustrating”, a map people want to play once or twice per session, not on repeat.
Platform Differences:
Console players report more balanced matches, possibly due to less precise long-range aim making defender positions less oppressive. PC players with mouse aim dominate from elevated positions more effectively, leading to more attacker complaints.
The map’s performance is generally solid across platforms, with no major technical issues reported in recent patches.
Tips for New Players Exploring Allatoona Pass for the First Time
If you’re loading into Allatoona Pass for the first time, here’s what you need to know:
Start as a Defender: The map is easier to learn from defensive positions. You’ll get a feel for sightlines, chokepoints, and common attacker routes without the pressure of coordinating complex pushes.
Study the Terrain in Practice Mode: If your game offers it, explore the map solo. Identify the three main zones (Pass, Star Fort, Ridges) and walk the trench networks. Knowing where cover is during a firefight is crucial.
Follow Veteran Players: Stick with experienced squad mates for your first few rounds. Watch where they position, when they push, and how they use equipment. Allatoona Pass has a steep learning curve: don’t expect to dominate immediately.
Prioritize Staying Alive Over Getting Kills: Your KD will be rough initially. Focus on supporting your team, dropping ammo, providing smoke, spotting enemies, until you understand the map flow.
Learn One Route at a Time: Don’t try to master the entire map in one session. Pick either the eastern ridge, western ridge, or central pass and learn it thoroughly before moving to others.
Adjust Your Sensitivity/Aim Settings: The map features a lot of vertical aim requirements. If you’re on console, consider increasing your vertical sensitivity slightly. PC players should ensure their DPI allows smooth tracking on elevated targets.
Expect to Die to Snipers, A Lot: Elevated defender positions make this a sniper-friendly map. Move unpredictably, use cover, and don’t stop in open areas. You’ll develop better movement habits faster here than on more forgiving maps.
Communication is Everything: Even if you’re new, call out enemy positions. Use pings if you’re not comfortable on voice comms. Your veteran teammates will appreciate the intel.
Don’t Get Discouraged: Allatoona Pass is brutal for new players. Everyone feeds kills here initially. The difference between a new player and a veteran on this map is massive, but it’s also one of the best training grounds for developing tactical FPS skills.
Conclusion
Allatoona Pass Battlefield stands out because it doesn’t let you coast on mechanical skill alone. The map forces you to think about positioning, timing, and team coordination in ways that most FPS arenas don’t. Whether you’re grinding for wins or just exploring historical battlefields in gaming, understanding the terrain and tactics here translates to better performance across similar maps.
The historical roots give the map its structure, but the gameplay possibilities make it memorable. Defenders who master the star fort and ridges can hold against superior numbers. Attackers who coordinate their pushes and use the terrain smartly can crack even the toughest defenses.
If you’ve been struggling on Allatoona Pass, revisit your loadout choices and communication habits. If you’ve been dominating, try teaching newer players, the map’s complexity makes it a perfect training ground for developing strategic thinking that carries over to competitive play.
Now get back in there and take that pass.